PART 2 : THE DEATHLY PREPARATION & PAINTING
Dear muggles, dear wizards,
As promised, Harry Potter is back in the Daily Prophet to reveal new secrets, not those of Dumbledore but of Tsume, in this "Part 2: The Deathly Preparation and Painting!".
While some had fun looking for eggs in their garden, secrets in their chamber or even horcruxes, our wizard’s apprentices continued to practice their spells to make magic work!
And this time, rather than dragging their memories into our Pensieve, we've subtly stolen Harry's Invisibility Cloak (yes, the one on the statue unveiled on April 1st!), in order to explain you the progress of the final stages of creation of the Harry Potter statues by Tsume!
To start smoothly, in the absence of delicious Chocolate Frogs, let's begin with a good Preparation!
![]()
Lesson Number 2 : « Preparation or the key to success »
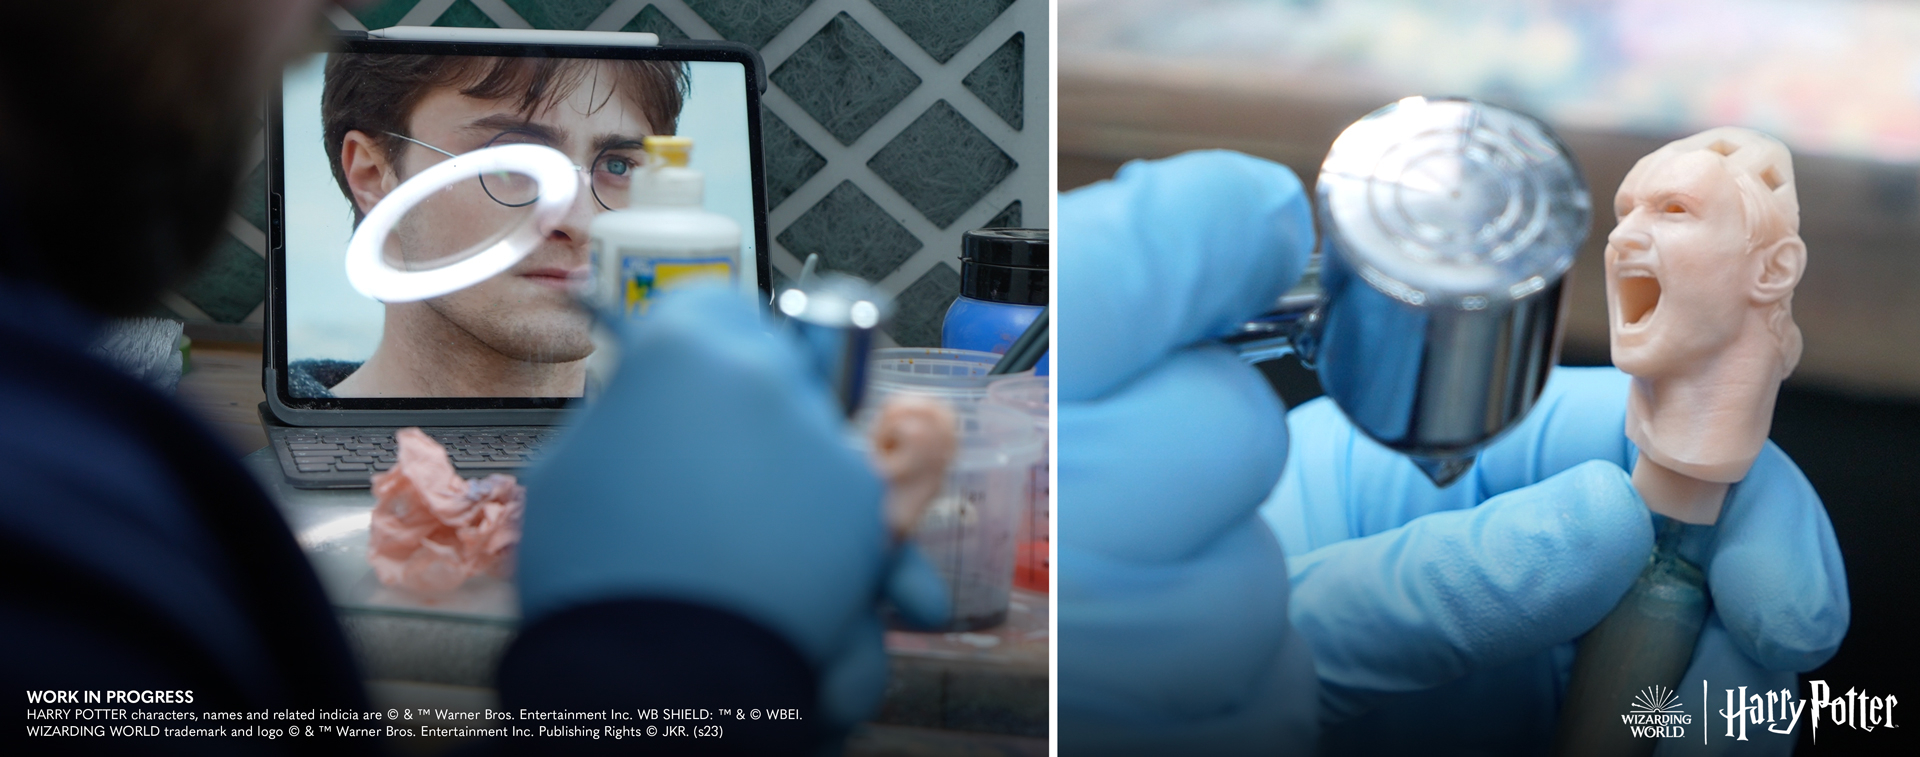
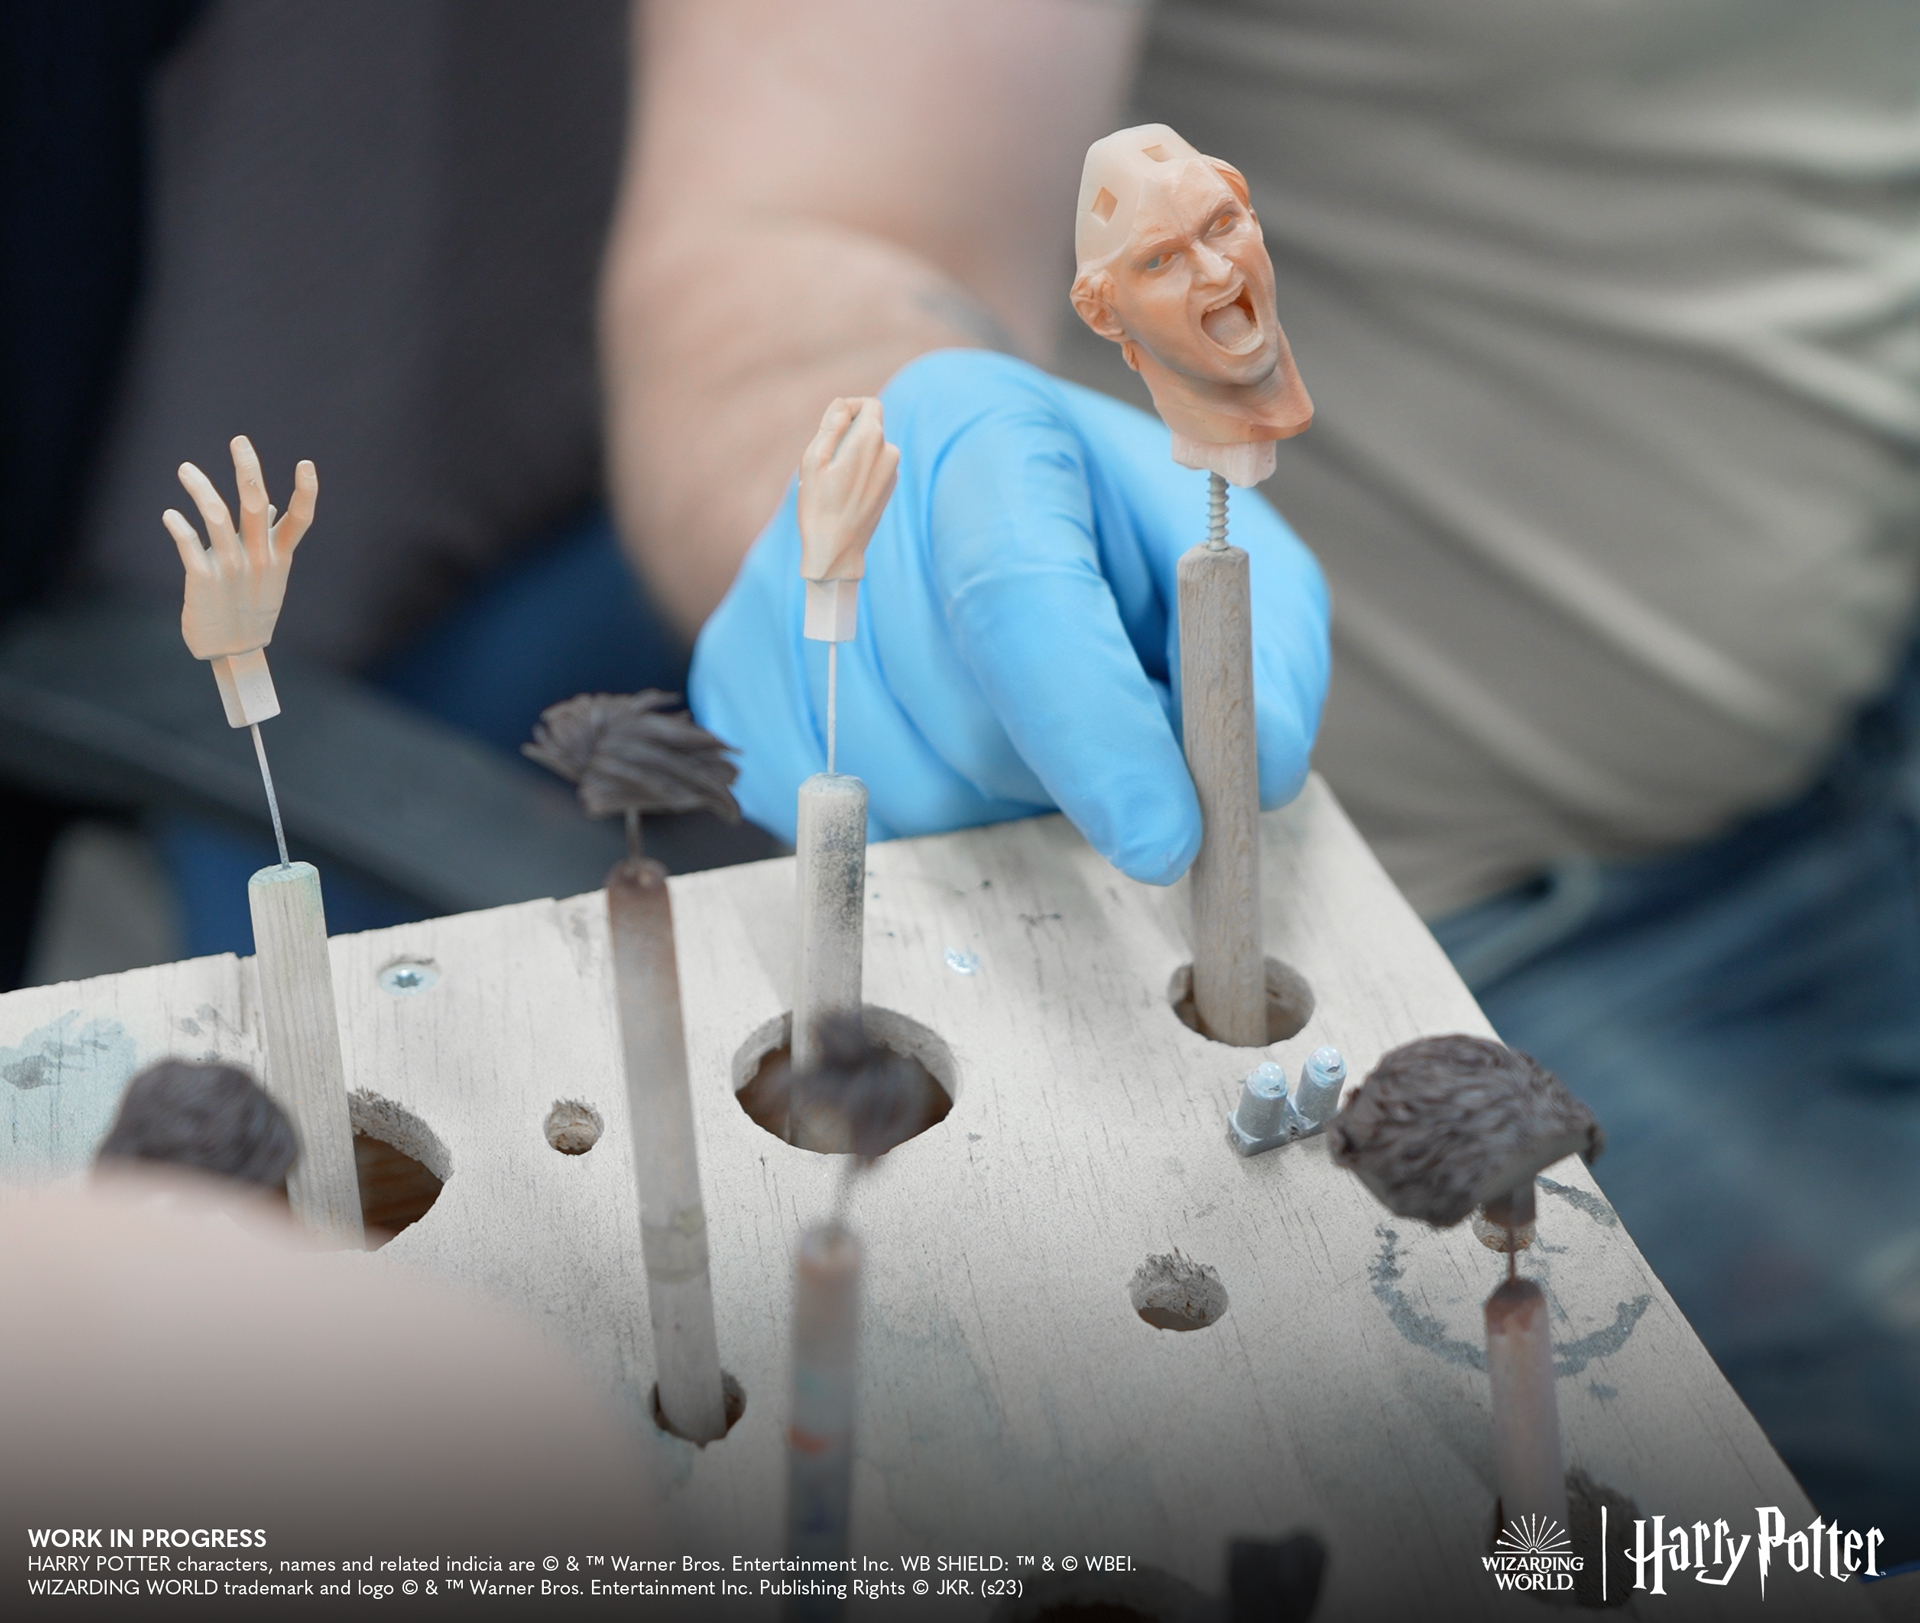
While Harry was preparing for his confrontation with Voldemort, Dumbledore for the inevitable, Hermione to pass her OWL and Ron to do nothing, our wizard apprentice artists were preparing the parts of the statues before painting: an essential step for the success of the project!
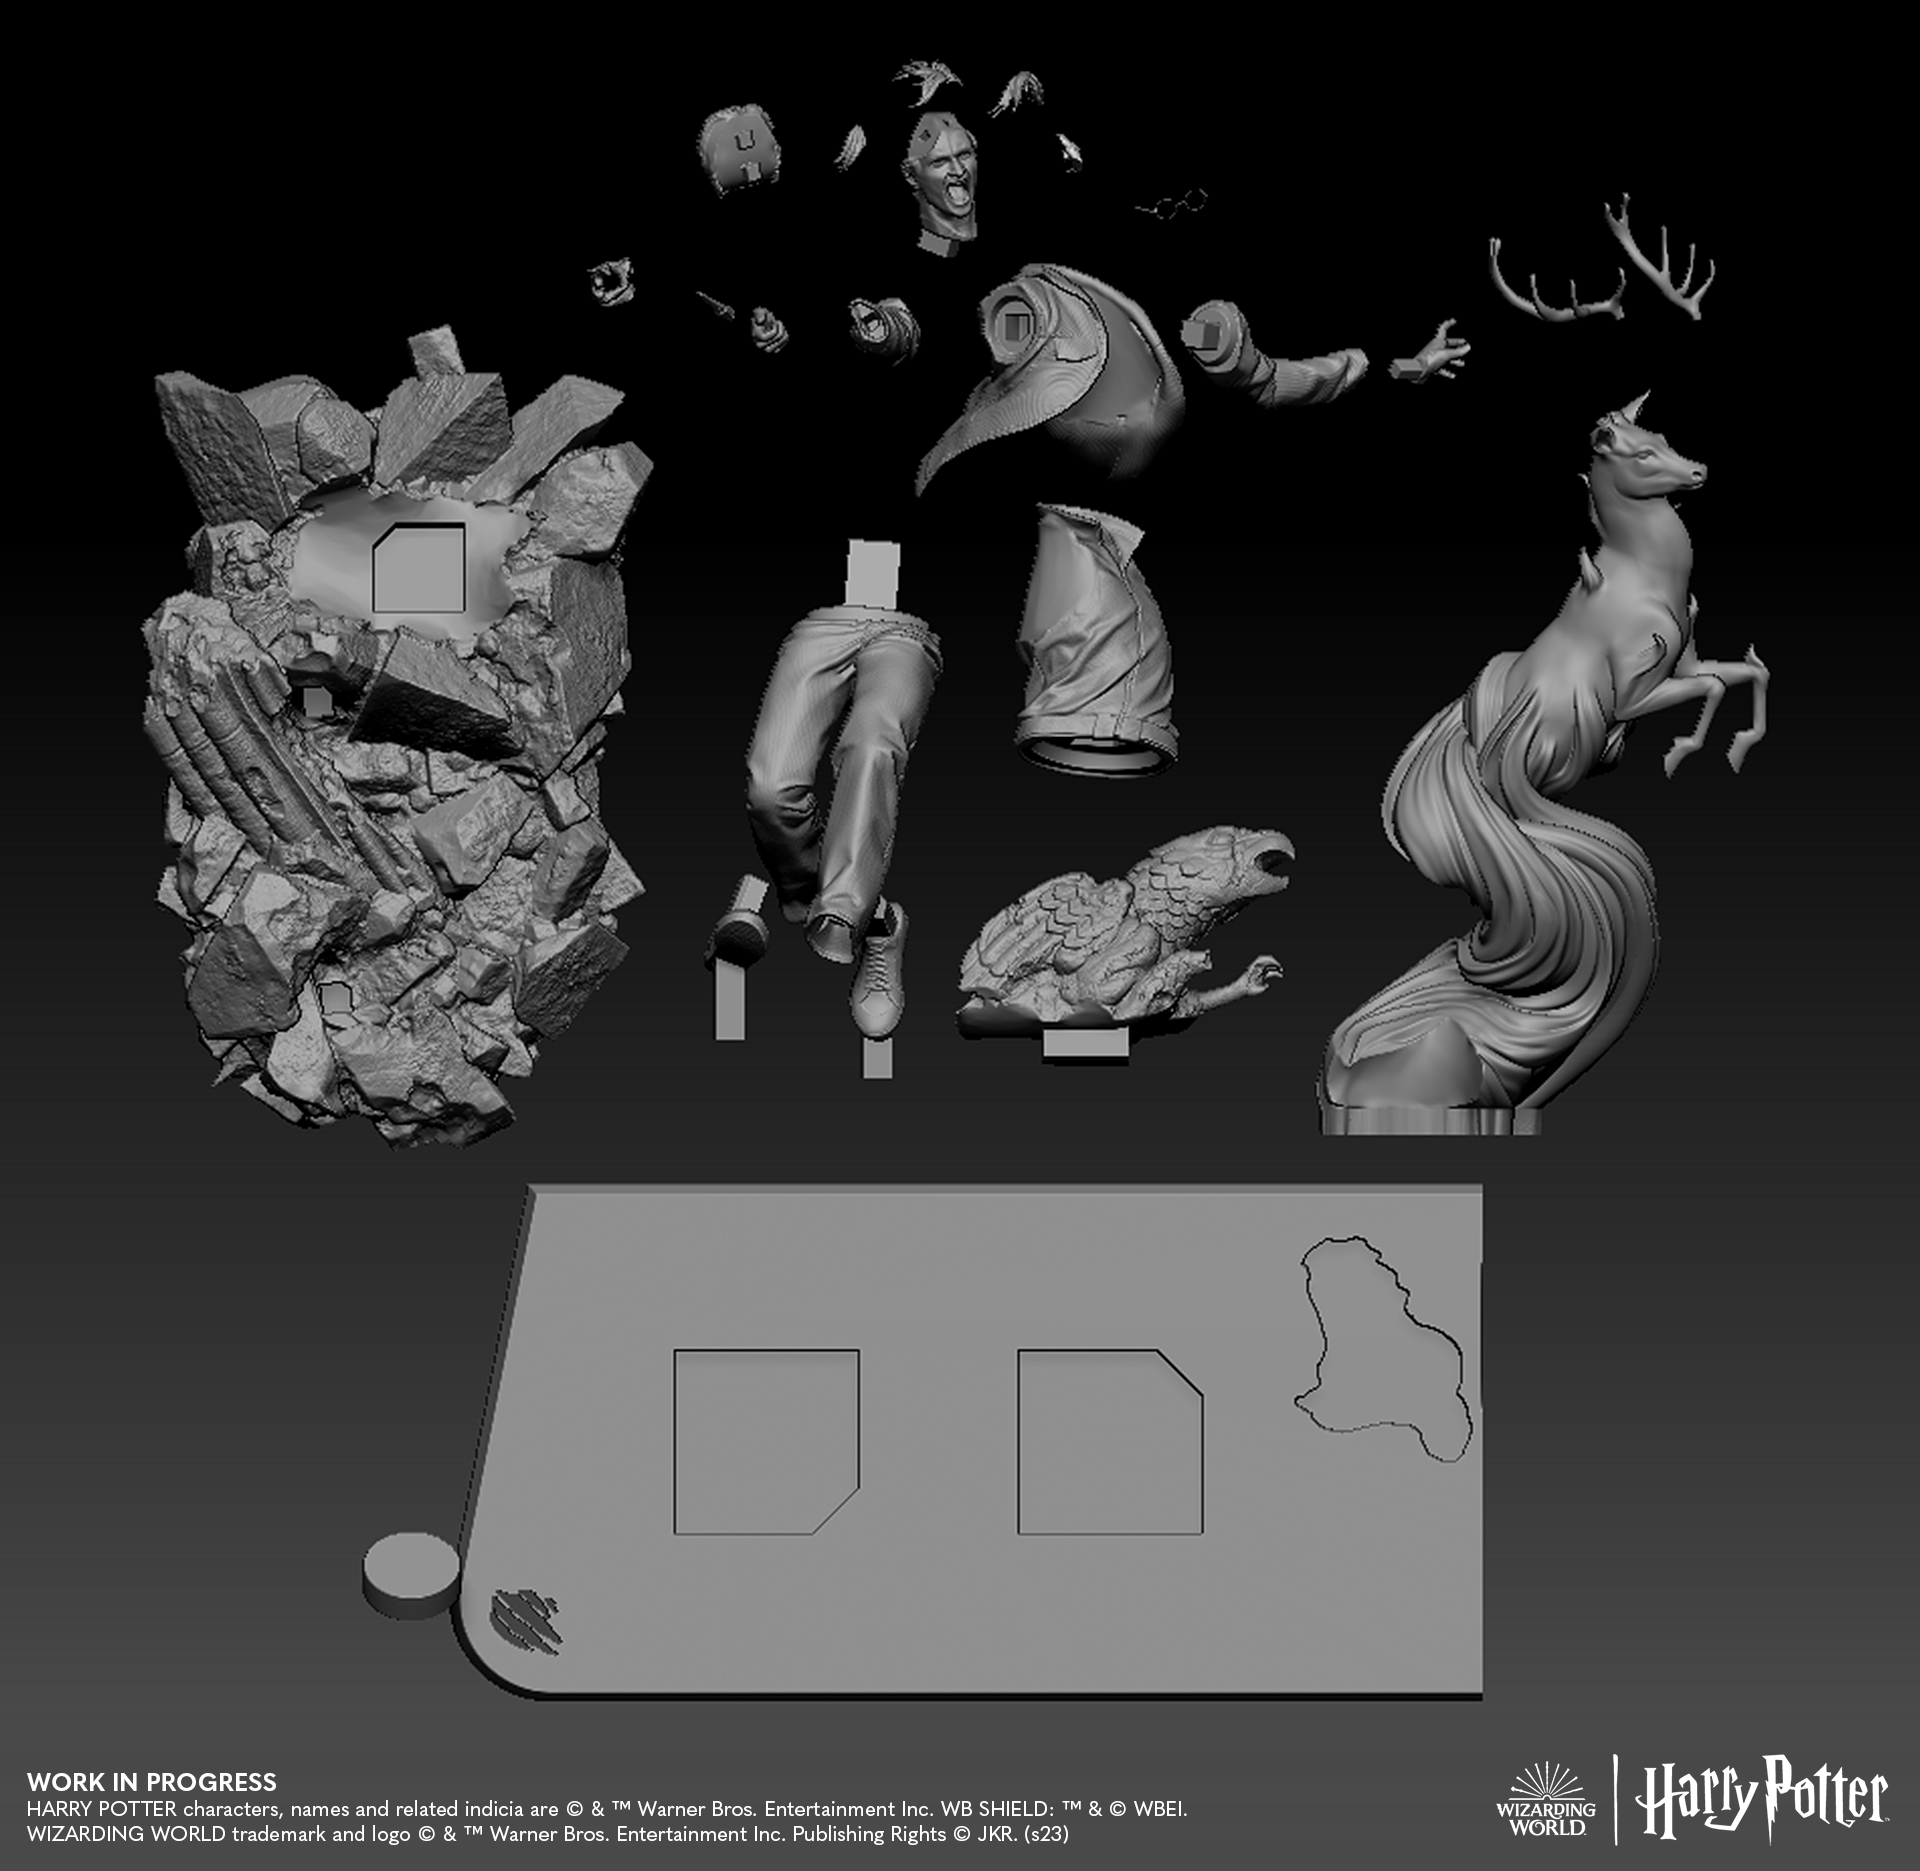
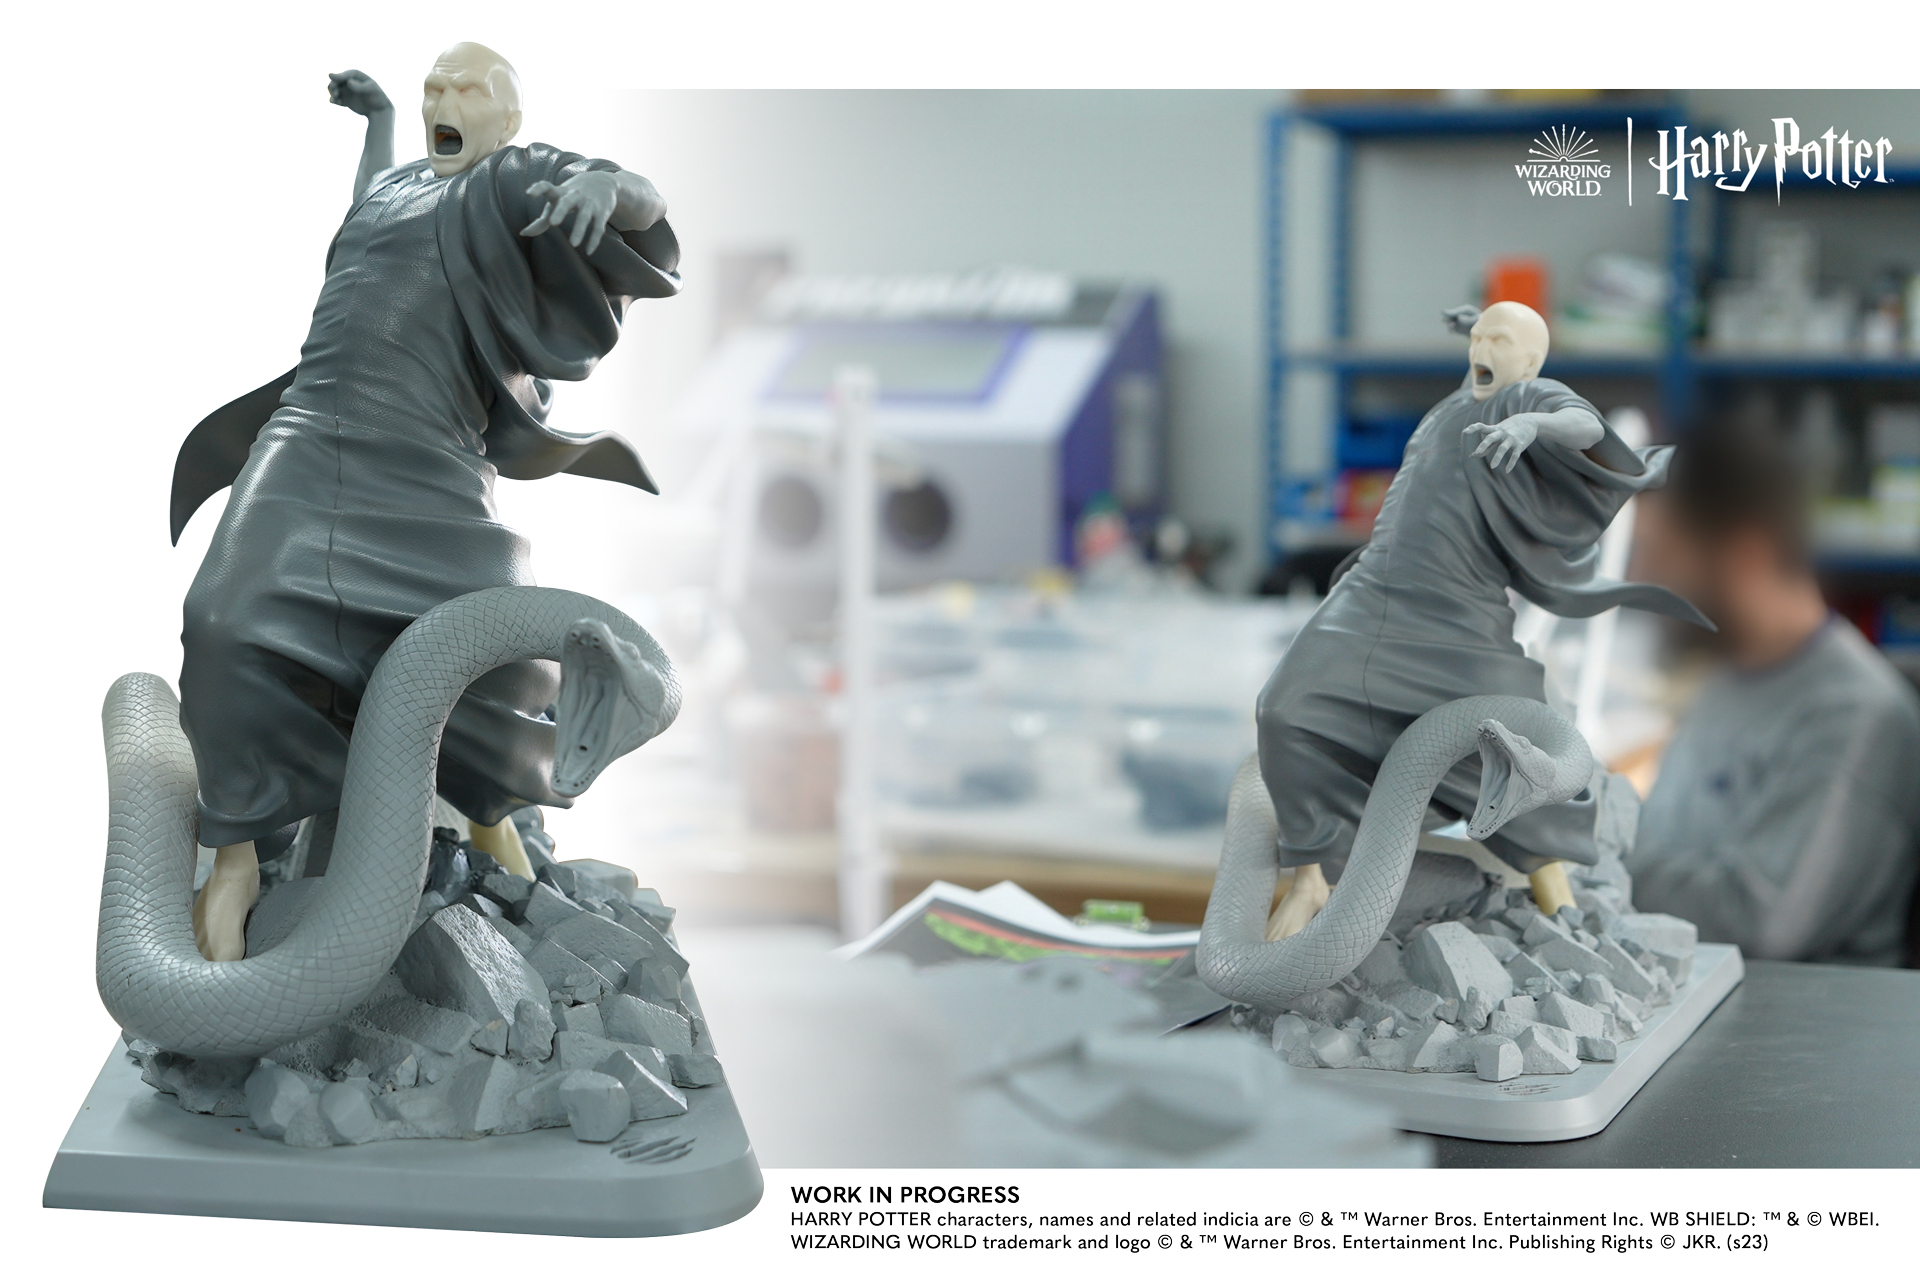
Indeed, once the statue has been printed in 3D, it is first necessary to unclip each piece of the support by removing the printing pads. For transparent resin pieces like Harry's Patronus or Voldemort's Snake, you have to make a silicone mold and then pour the resin into it to get the final piece. Then, the spare parts must be sanded and reworked, taking care not to lose or alter their texture. Finally, they can be assembled, checking that the studs fit together perfectly.

Once this is done, the preparers ensure that the character is perfectly aligned with the base using a laser beam. Some adjustments may then be necessary. Take the case of the famous Dark Lord and his crawling horcrux, which gave us not a hard time but a snake to straighten! Indeed, the reptile being made of transparent resin, more sensitive to temperature changes, it was therefore necessary to heat the cold-blooded creature to put it in the right axis and thus ensure that Nagini was in phase with its master!
Now that we are well prepared, let's take action with the final stage of realization!
Lesson Number 3 : « Realistic Painting or breathing life without magic »
“Transfiguration Is Some Of The Most Complex And Dangerous Magic You Will Learn At Hogwarts.“ – Miss McGonagall.
And our dear Transfiguration Teacher knows what she's talking about! Since the statues are directly inspired by actors and therefore by the appearance of real people, their painting must therefore represent them as faithfully as possible! Realistic painting indeed requires the use of techniques different from those used to create anime, manga or video game characters, and unsurprisingly, these are not included in the Guide to Advanced Transfiguration!
He-Who-Must-Not-Be-Named but Must-Look-Real!
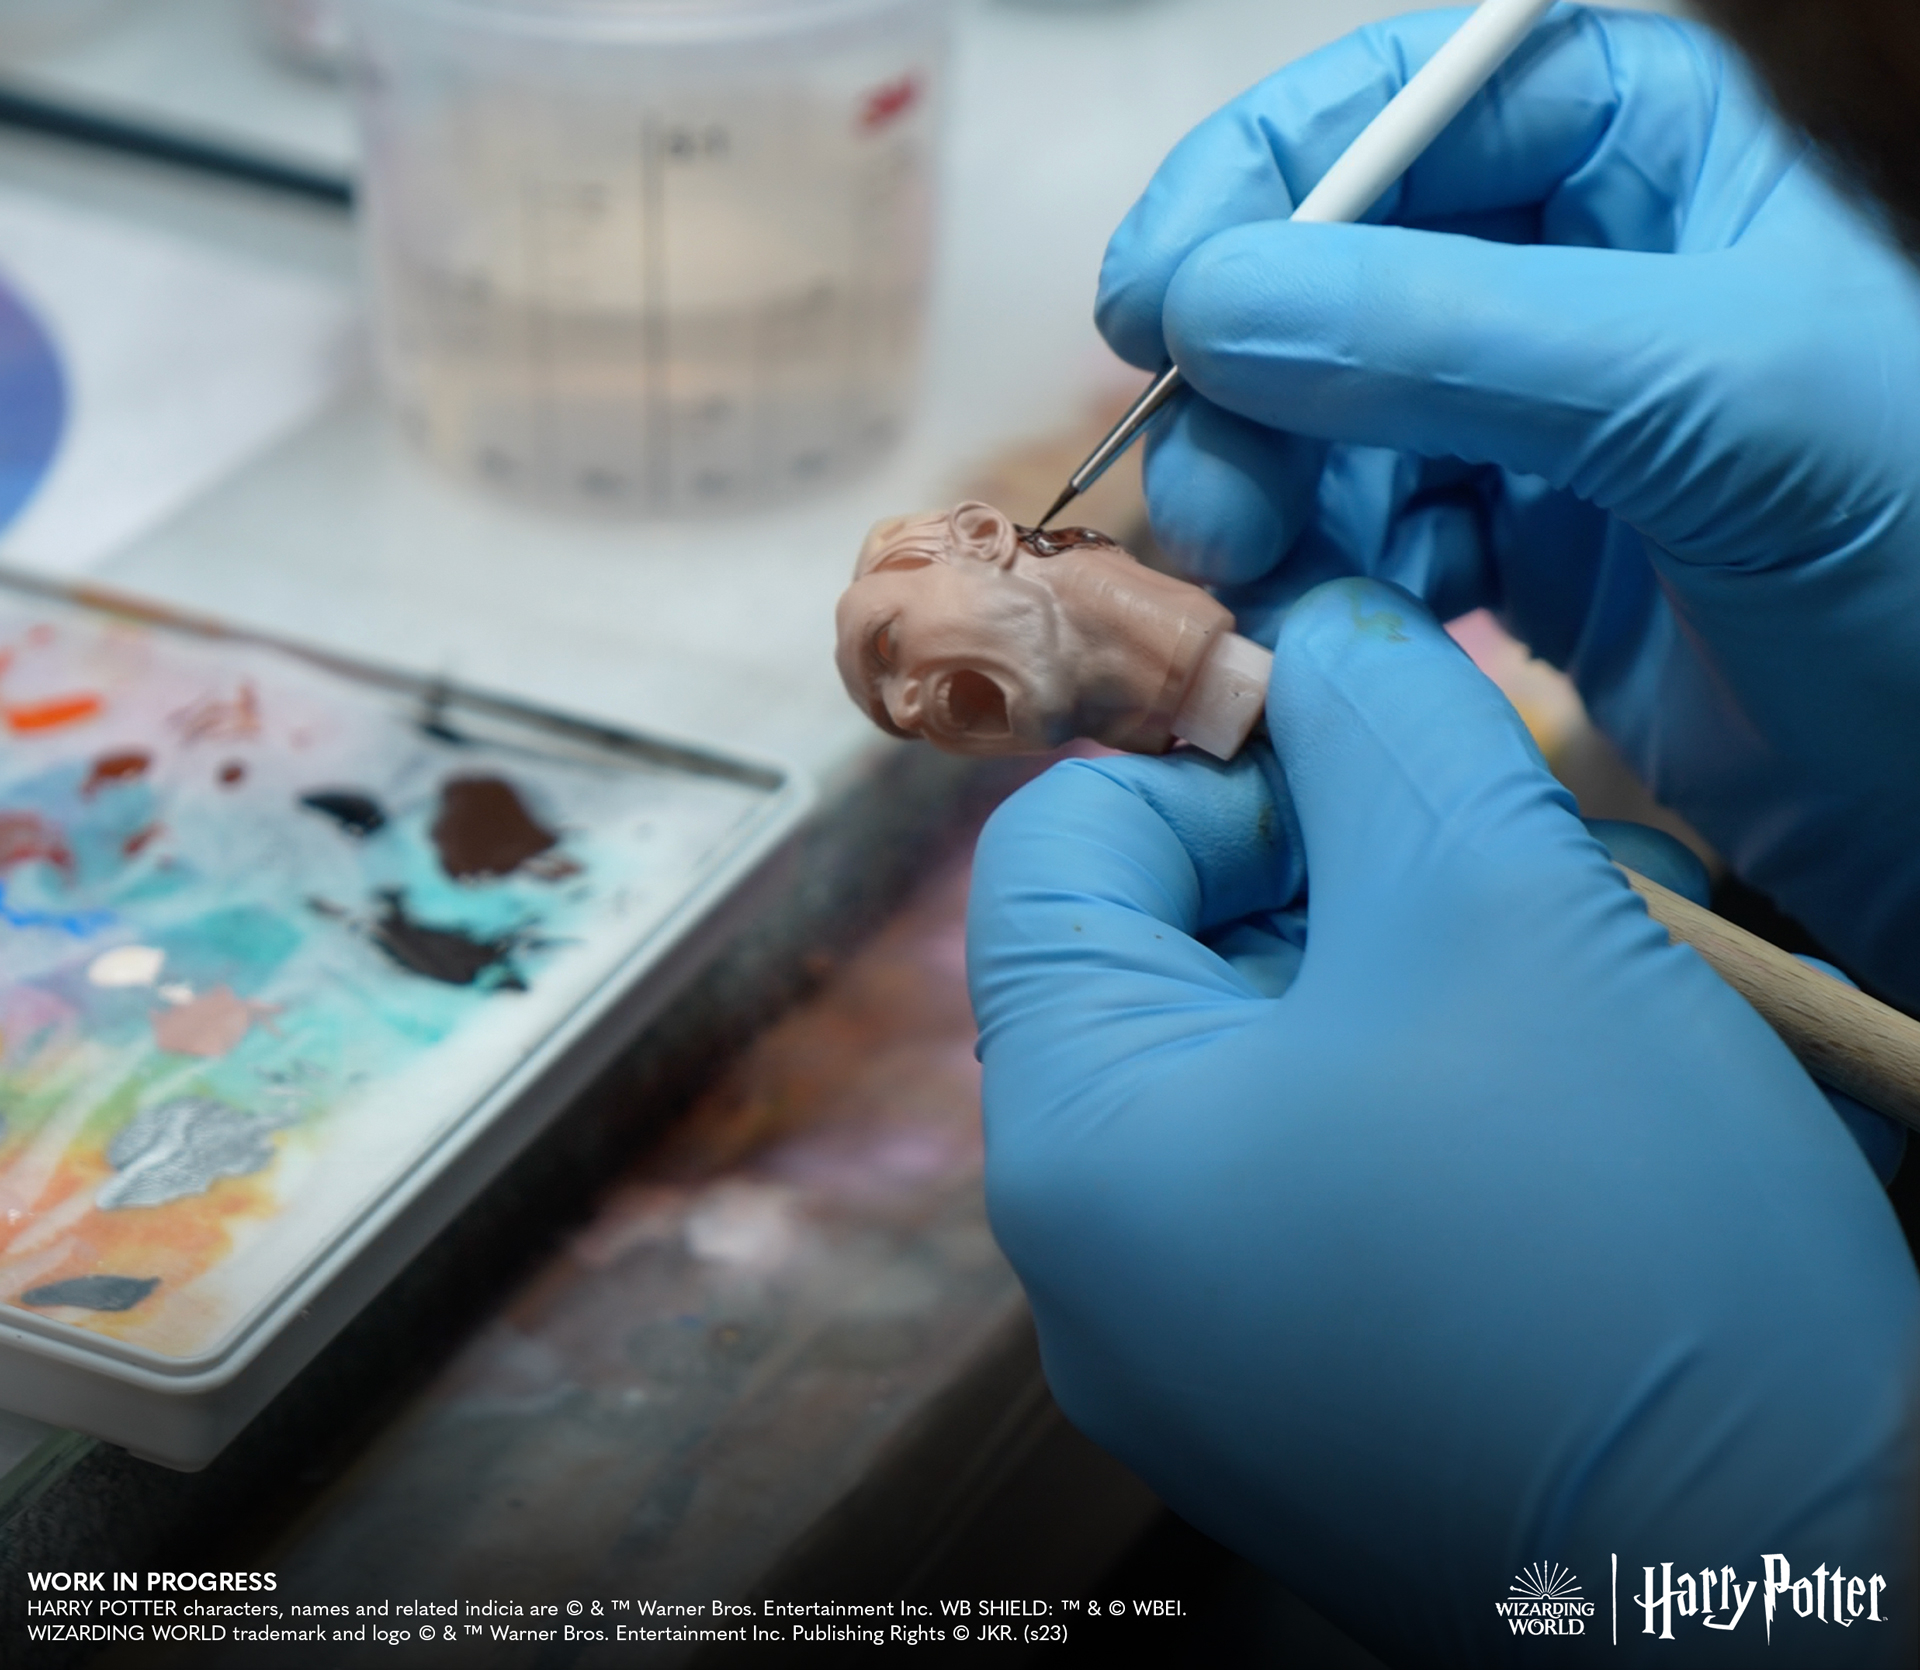
Let's start by revealing to you how our wizard apprentice artists allowed the Dark Lord to resurrect in order to fight his final battle! Pettigrew could not be contacted to give us the recipe for his potion based on flesh, blood and bones, so our artists took over (not his hand!) using their talents as painters to give it life! Good news, it works too!

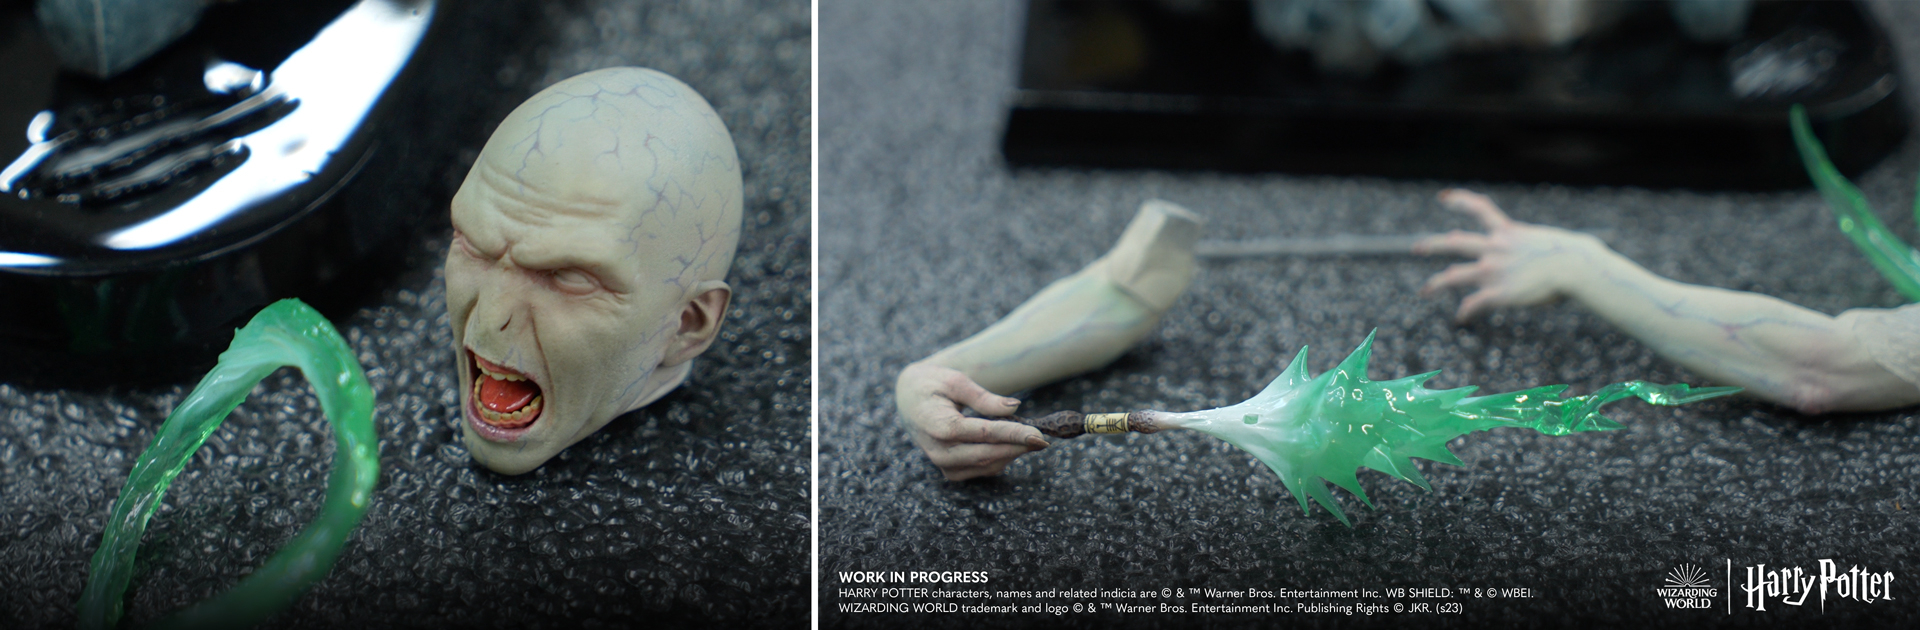
Obtaining a realistic rendering in painting requires more work on the textures and the use of different varnishes. To give a reptilian aspect to the skin of the Dark Lord, our painters applied a satin varnish, just like on the ssnake’ss sscales. Nagini's pupils were painted by hand and then, like those of its master, they were coated with a glossy varnish to breathe life into its cold-blooded killer gaze. This same varnish was also applied to the (parsel)tongue and teeth of the two revenge-hungry predators to imitate saliva, or venom...
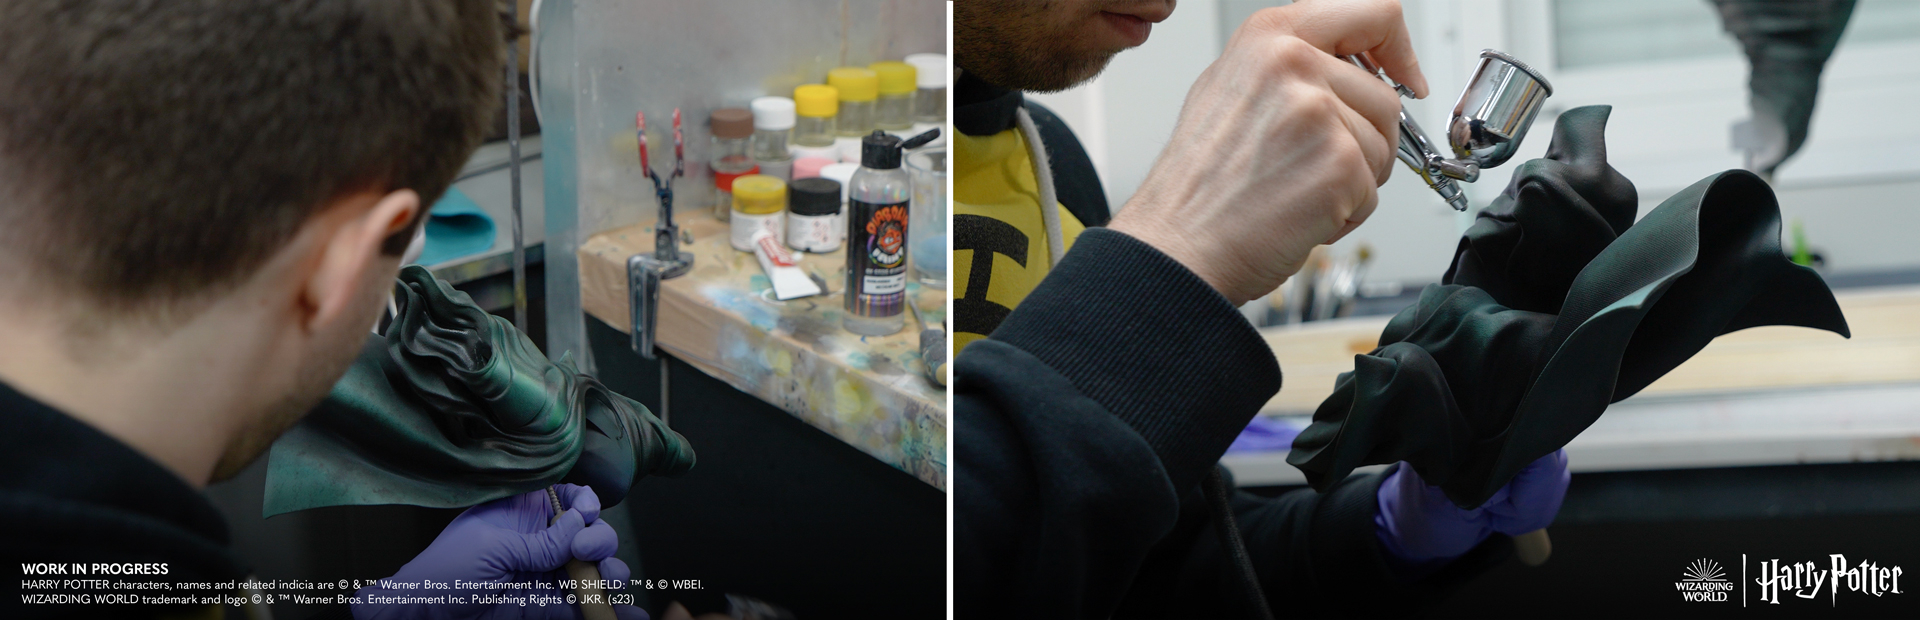
Regarding the robe of the powerful wizard, a matte varnish has been applied to it. Our painters added green shading and light effects, OSL (Object Source Lightning), to the former Slytherin student's outfit to reflect the killing spell he casts with the Elder Wand in Harry's direction: Avada Kedavra! This makes the statue more alive, as if the action is happening the very moment you look at it. Finally, concerning the one who divided his soul, our wizard’ apprentices painted the visible veins on his skull with a brush, using several bluish shades and varying their intensity to reinforce realism and highlight the translucency of his skin.
The-Boy-Who-Lived after The-Painter-Inflicted-The-Brushstroke-On-Him …
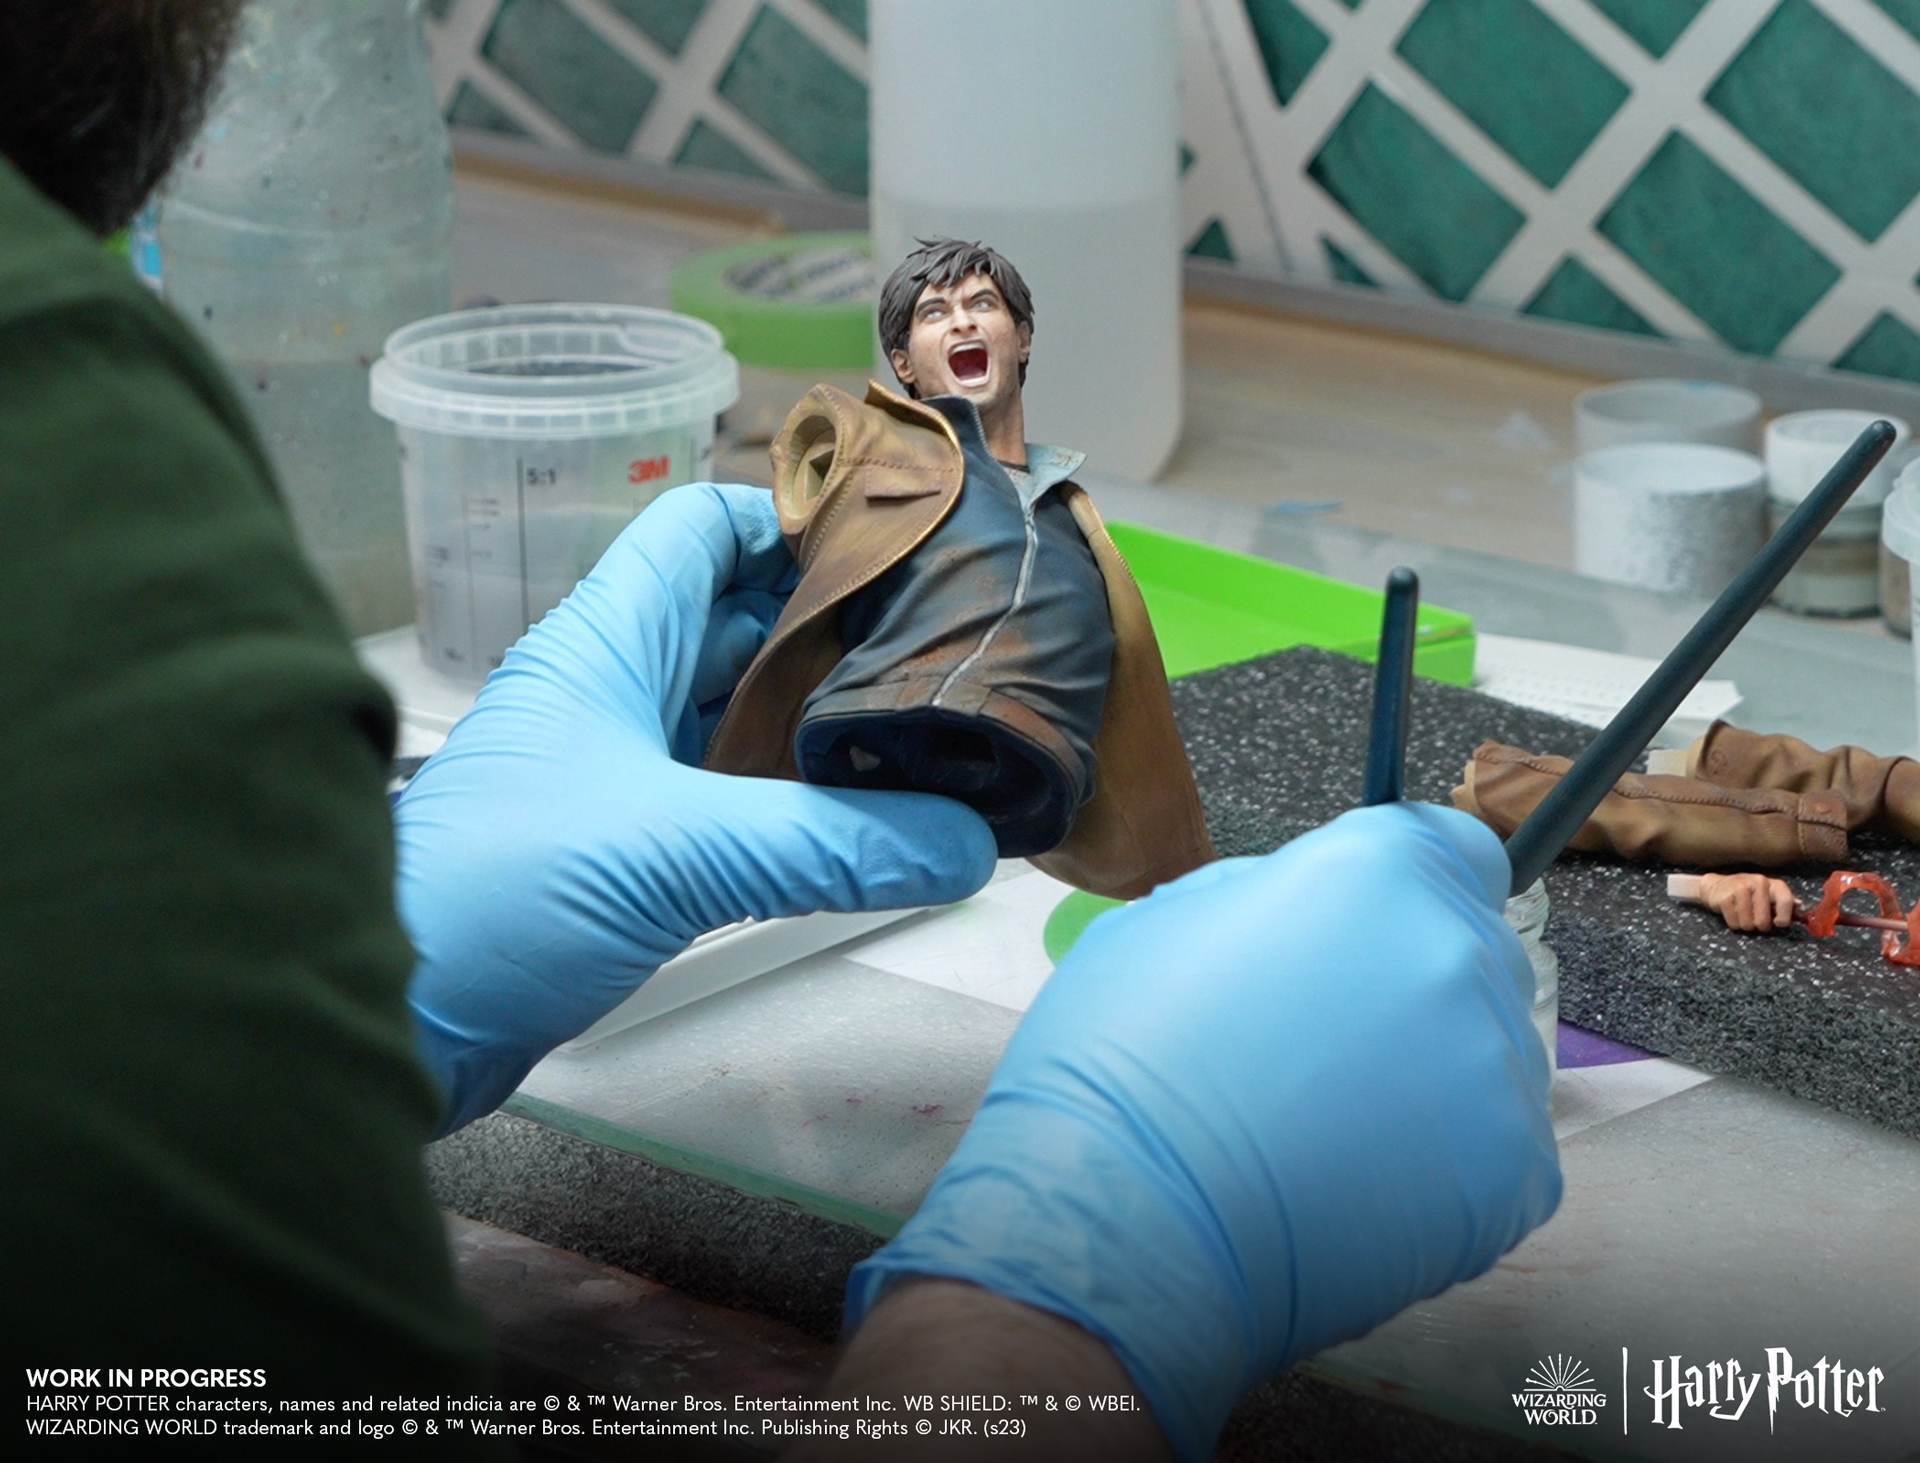
The work done on the survivor has some differences. Indeed, painting a human face in a realistic way requires great attention to detail so that it resembles that of the actor that seems alive. Being out of Polygonum to prepare Polyjuice, we had to rely on the talents of our wizard apprentice artists! In fact, for a face to be realistic, it must be possible to observe the skin texture, pores, shadows, redness, veins, moles, wounds... In summary, each detail contributes to making the character more alive and in particular his imperfections, since no human being is perfect, not even the Chosen One, and even less during a fight to the death!
Thus, to make each of these small elements appear, our painters colored the skin and created the shading on the face by performing a wash. By applying a varnish on this first coat of paint, they can then rework over it to bring out all the details. A wash is a paint very diluted with water with which one applies several layers to create and underline the imperfections and shades. The wash used for Harry's face is made with blue and red paint. In order to accentuate the imperfections, you can seek advice from Malfoy who collects them, or else do as our painters do by using an airbrush at very low pressure to create micro-jets of paint. Regarding the hero's scars that do not date from the cradle, a shiny varnish has been applied to his bloody wounds to appear still fresh, as if they had just been inflicted on him.
Concerning the determined look of the savior, a white paint is applied as a base, then a wash is made with successive layers of yellow, red and blue paint, since the white of the eye is not pure, even if the look of our hero certainly is! A glossy varnish is then applied to the eye to make it look moist, bringing the look of The-Boy-Who-Lived to life. As for Harry's lips, not as soft as his Chosen One Ginny imagines, our painters applied a wash of pink, red and blue paint, as did his tongue to create texture. And since our hero shows his teeth, our painters applied a sepia wash (yellow-brown) then varnished them like the tongue to imitate saliva. Like eyes, teeth are never naturally pristine white. Sorry Harry, reality TV is not for today, saving the wizarding world is a priority!
Regarding his eyebrows, we followed Hagrid's beauty advice! They were thus made with a brush to give them an irregular side with lines going in different directions rather than forming a straight and perfect line. Again, for the realism to be on point, it is essential to highlight the character’s attributes and imperfections! Always following the advice of our hair expert, our wizard’s apprentices brushed the Chosen One's hair with the brush, because he badly needed it but also to create color nuances and shades. To do this, the paint is applied to the brush which is rubbed on kitchen paper. Thus, our wizard’s apprentices do not completely cover the hair to avoid homogenizing it. This allows you to emphasize every detail and give different shades to the locks of the Chosen One, because he’s worth it! This same technique is also used to bring out the edges and details of the rocks.

Regarding Harry's general condition during this merciless fight, our wizard’s apprentices supported him by using not the Unforgivable Curse, but their wavering technique. This makes it possible to give a dirty and aged effect to the textures of the clothes thanks to a wash and different color pigments. This is also the case for the hero's skin with the use of varnish and colored pigments, revealing the full intensity of this fierce struggle. As for the condition of his clothes, Mrs. Weasly is sure to send us a Howler! We indeed simulated dirt and dust using sand mixed with dull colored pigments, Harry having found himself on the ground when he had a date with his own death before delivering his final fight! Finally, following the example of the Dark Lord, our painters reproduced red light effects, OSL (Object Source Lightning), on the outfit of the Chosen One to reflect his Disarming Charm thrown at Voldemort, allowing him to snatch his wand and victory at the Battle of Hogwarts!
Now that all the secrets of the Dark Lord and The-Boy-Who-Lived And-Won have been revealed to you, it's time to prepare for the inevitable Pre-Order Battle...
See you soon for the ultimate Revelio! Evanesco!
The Tsume House